Ever wish your home felt cooler, looked sleeker, and gave you more privacy—without pulling the curtains shut all day?
You’re not alone. More homeowners are turning to home window tinting as their not-so-secret weapon. It’s affordable, stylish, and way more effective than you think.
In this post, you’re about to uncover 10 powerful window tinting secrets that can totally change the way your home looks and feels—inside and out.
Let’s make your windows work smarter, not just sit there.
Home window tinting boosts privacy, cuts heat, saves energy, and adds serious style. This post spills the top 10 secrets to get the most out of it.

What is Home Window Tinting?
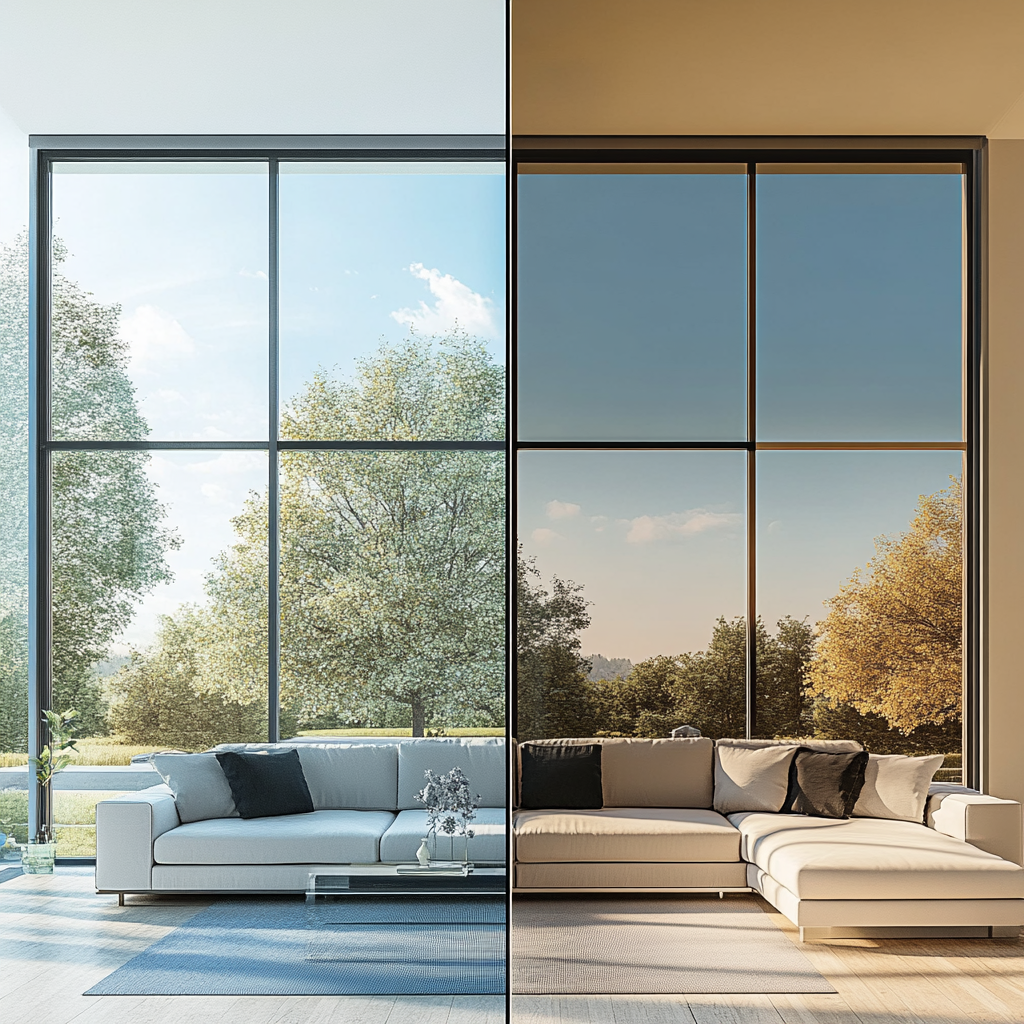
Let’s start simple: Home window tinting involves applying a thin, transparent polyester film to the glass in your windows. While that sounds pretty low-key, the benefits are far from basic. Think of it like giving your home a pair of designer sunglasses, blocking out the harsh UV rays, cutting down on glare, and maintaining a comfortable temperature all year round.
It’s essentially a way to manage how much sunlight and heat come into your home — without the need to close the blinds and hide away from the sun completely. 🌞 So, you get to enjoy the beautiful daylight streaming in without the painful side effects. You also get the added perk of increased privacy, especially if you’re living in a neighborhood where everyone knows everyone’s business. No more peeping neighbors! 😏
Types of Window Tint: Which One’s Right for You?
Now that you know what window tinting is, let’s break down the different types of window film you can choose from — because not all tints are created equal. There’s a tint for every budget, style, and need.
-
- Dyed FilmPros: The most affordable option. Great for cutting down glare and improving privacy.
- Cons: It doesn’t block out heat as effectively as other types, so your energy savings might not be as significant.
- Best For: Budget-conscious homeowners who want a simple solution to glare reduction.
- Metalized FilmPros: Reflective and excellent at blocking heat. It also strengthens the glass, which is a nice bonus.
- Cons: The shiny, reflective finish might interfere with some signals (hello, poor Wi-Fi reception!).
- Best For: People looking to reduce energy costs without compromising on style.
- Ceramic FilmPros: The gold standard of window tinting. Blocks heat and UV rays, all while maintaining clarity and never interfering with signals. It’s the best of both worlds.
- Cons: The most expensive option, but definitely worth the investment for long-term savings and comfort.
- Best For: Homeowners who want superior quality, privacy, and energy efficiency and are willing to pay for it.
How Window Tinting Benefits Your Home
- Energy Savings: With ceramic window tinting, you can reduce cooling costs by up to 30%. Imagine cutting down your AC use just by adding some stylish film to your windows. That’s a win for your wallet and the planet. 🌎
- UV Protection: Tinted windows block harmful UV rays, protecting your skin (goodbye, sunburns!) and preserving your furniture and floors from fading. Your couch will thank you. 🛋️
- Increased Privacy: With one-way tinting, you get privacy during the day without blocking the view outside. No more feeling like you live in a fishbowl. 🎥
- Less Glare: Tired of squinting at your laptop or TV? Tinting eliminates that annoying glare, letting you enjoy your space without worrying about the sun’s power. 🌞👀
What’s the Catch? (And How to Make It Work For You)
Now that you’re thinking about tinting your windows, you might be wondering: Is this too good to be true?
Here’s the deal: While tinting is fantastic, it’s not magic. It won’t eliminate the need for air conditioning, and it’s not going to stop you from cleaning up the dust around the house. The main thing to keep in mind is proper installation. If your tint isn’t applied correctly, you might end up with bubbles, peeling, or uneven coverage. Yikes.
But don’t worry — we’ll cover all that in the next section when we get into the differences between doing it yourself and hiring a pro. Stay tuned! 👀
🛠️ DIY vs. Hiring a Pro: Which Tinting Path Fits Your Vibe?
So, you’ve decided you’re ready to step up your window game. But now, the burning question is: Do I tackle this project myself, or should I call in the experts?
Don’t worry; we’ve got the answers! Whether you’re all about the DIY life or you prefer to let the pros handle it, here’s everything you need to know to make your decision.
Hiring a Pro: The White-Glove Tinting Experience
Pros
- Speedy Install: If you want your windows tinted quickly and efficiently, hiring a pro is your best bet. They’ll get the job done in a fraction of the time it would take you.
- Flawless Finish: No bubbles, no peeling — just perfect, smooth, professional-grade tinting.
- Warranty Protection: Professional window tinting often comes with a warranty. If anything goes wrong (like peeling or bubbling), you’ll be covered, and the installer will take care of it.
Cons
- More Expensive: Let’s be real — hiring a pro isn’t cheap. You’re paying for their expertise, speed, and convenience.
- Limited Film Variety: Not all tinting companies offer a wide selection of films. If you’re looking for something specific or fancy (like a custom color), DIY might give you more options.
Best For:
- Homeowners who want perfect results and don’t mind paying for it.
- People who don’t have the time or patience for a DIY project.
- Those looking for guaranteed results and peace of mind.

DIY Window Tinting: The Weekend Warrior Route
Pros
- Budget-Friendly: DIY window tinting is cheaper than hiring a pro. You’ll spend far less on film and tools, plus you’ll get to keep the savings for yourself.
- Choose Your Tint: Unlike professional services, when you tint your windows, you have full control over the film’s color, style, and features.
- Bragging Rights: Let’s be real, DIY is satisfying. When you complete a project on your own, you get to brag to your friends and family: “Yeah, I tinted those windows myself!” 😎
Cons
- Prep-Heavy: DIY isn’t a walk in the park. You’ll need to clean your windows thoroughly and make sure the film is cut to the right size. It’s a bit of work but totally doable if you’re motivated.
- Bubble Risks: If you’re not careful, you could end up with air bubbles or wrinkles in your tint. It’s a common issue for first-timers, but don’t worry, you can fix it — it just takes time and patience.
- Mistakes = Redo: Tinting isn’t foolproof. One slip-up, and you might have to start over. But, hey, that’s part of the learning process, right?
Best For:
- Homeowners who are budget-conscious but still want a high-quality result.
- People who love hands-on projects and want to learn a new skill.
- Those who aren’t afraid of a little trial and error.
Cost Breakdown & ROI: Is It Worth It?
So, what’s the real cost of getting those windows tinted? Let’s break it down:
- Pro Install: Typically costs around $5–$10 per square foot. Depending on the size of your windows and the complexity of the job, it could add up quickly.
- DIY Kits: If you’re going the DIY route, you’ll pay about $2 per square foot. DIY kits include the film, tools (squeegee, knife), and instructions. The biggest cost here is your time and effort.
ROI (Return on Investment):
Whether you go pro or DIY, window tinting can save you money in the long run by reducing cooling costs (up to 30%) and protecting your furniture from fading due to UV rays. So, while there’s an initial cost, you’ll save money in the future.
🧰 How to Tint Your Windows at Home Without Losing Your Mind
So, you’ve decided to take the DIY plunge and tint your windows. Welcome to the club! 🏆 Trust us, it’s not as hard as it seems, and with a little patience, you’ll be enjoying your newly tinted windows in no time.
Follow these steps carefully, and soon you’ll have a professional-looking finish, even if this is your first time.
🔧 Pre-Tint Prep: The Foundation for Success
Before you jump in and start slapping film onto your windows, let’s go over the essentials.
What You’ll Need:
- Window Tint Film (Pre-cut or Roll): You can find high-quality DIY kits that come with pre-cut pieces for common window sizes. If you’re doing this from scratch, get the roll.
- Tint Application Spray (or water + baby shampoo): You’ll need a spray to help you adjust the film and prevent it from sticking before you’re ready.
- Squeegee: To remove air bubbles.
- Utility Knife: This is for cutting the tint to fit your windows.
- Microfiber Cloths: To clean the windows and wipe away any excess moisture.
- Spray Bottle: Use a clean spray bottle to apply your soapy solution evenly across the glass.
- Soapy Water: Mix a few drops of baby shampoo with water to create your own soapy water solution—perfect for sliding the tint film into place.
Tips for a Smooth Process:
- Clean your windows thoroughly with non-abrasive cleaners. Any dust or grime will cause the tint to bubble or peel.
- Remove any stickers or adhesives from the windows.
- Make sure your windows are completely dry before applying the film.
- If there are any stickers or old tint left behind, use a plastic scraper or a razor blade to gently remove the residue. For tougher spots, applying a bit of heat with a hair dryer can help lift adhesive residue more easily.
✂️ Step 1: Cutting & Applying the Film
Now comes the fun part! Here’s how to apply the tint like a pro:
- Spray the Window: Lightly spray the window with your application spray (or the DIY water + baby shampoo mix). This will help you slide the film around and make adjustments. Make sure the entire glass surface is wet so that the film doesn’t stick too soon.
- Peel the Backing Off the Film: Carefully peel the film’s backing to expose the adhesive side.
- Apply the Film to the Window: Place the film onto the window, sticky side facing the glass. Don’t worry about making it perfect at first; you can move it around as needed.
- Squeegee It Into Place: Begin in the middle and work your way out to the edges. using a squeegee to remove air bubbles and smooth out wrinkles. Make sure there’s even pressure as you go.
Pro Tip: Keep both the film and the window wet throughout the process. This makes it much easier to slide the film around and get a perfect fit.

✨ Step 2: Trimming & Finishing
Once the film is applied, it’s time to trim off any excess.
- Trim the Edges: Use your utility knife to trim around the edges of the window carefully. You want to leave just a small margin around the tint for a clean finish.
- Smooth the Edges: Run the squeegee along the edges one more time to make sure everything is sealed tightly.
- Use a clean window cleaner after trimming to check that all edges are sealed and clear. This also removes any marks left during the process.
- Let It Cure: Let the tint cure for at least 3–7 days, depending on the humidity. The longer you wait, the more likely the tint will bond and stay put.
Pro Tip: Avoid touching the film or cleaning it during the curing process. Let it settle and fully adhere to the glass.

🧹 Step 3: Troubleshooting Common Tint Fails
So, what happens if things don’t go according to plan? Don’t worry; it happens! Here are some common issues and how to fix them.
- Wrinkles: If the film gets a wrinkle, lift it off carefully, re-spray, and reapply.
- Peeling Corners: If you notice the corners lifting, apply a bit of heat with a hairdryer and re-squeegee to seal them back in place.
- Dust Bunnies: Sometimes, dust can get stuck between the glass and the film. Make sure to really clean the window before putting the film on it, and use the application spray to prevent it from sticking.

🎨 Style It Up: Window Tinting as Home Decor
Who says window tinting is all about practicality? Sure, it’s great for energy savings, privacy, and UV protection — but did you know it can also add a stylish flair to your home? 🤩
Tinted windows can be a design statement in their own right. Whether you’re going for a modern minimalist look or a more rustic vibe, window film can complement and elevate your space.
Let’s explore how you can use window tinting to add a pop of style to your home.
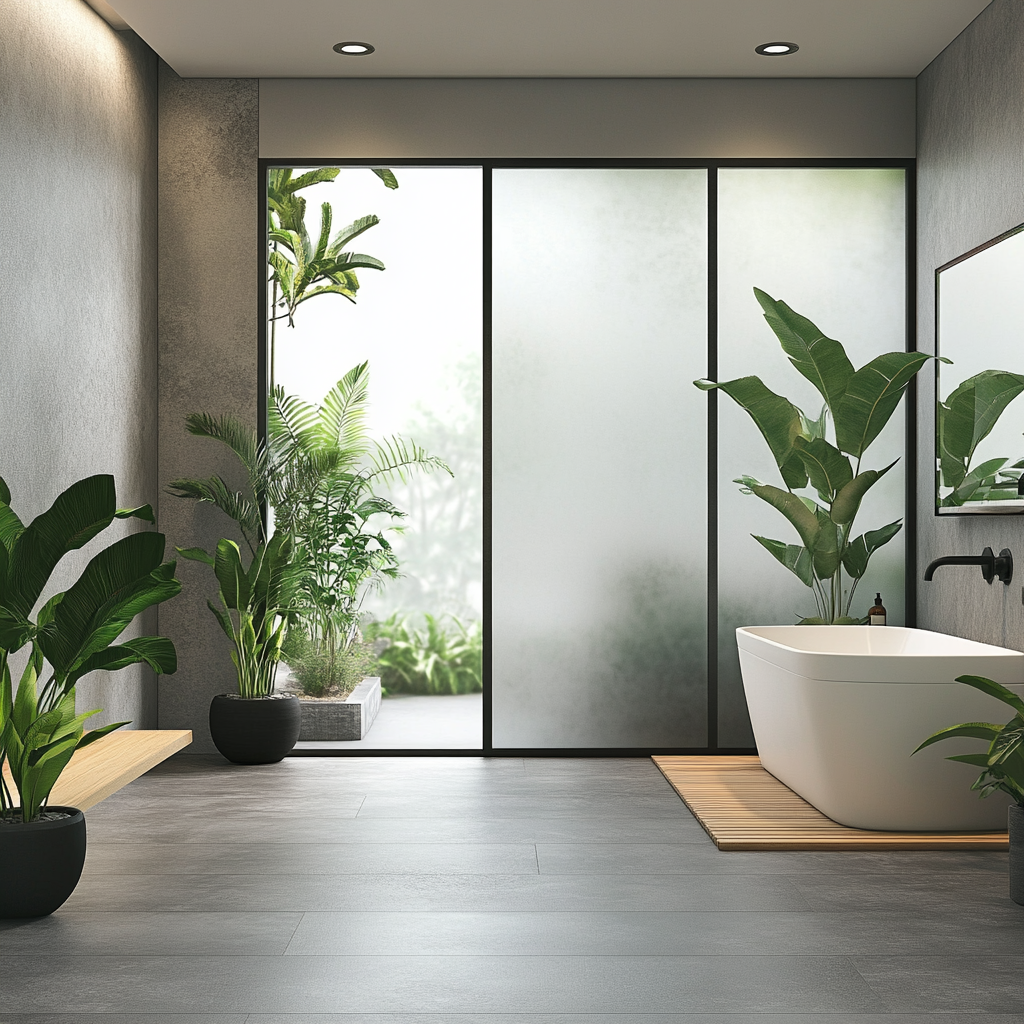
1. Privacy Frosted Films: The Spa-Like Bathroom Vibe
Imagine stepping into a bathroom with frosted window tinting. It adds a spa-like ambiance, keeps your space private, and still lets in the beautiful natural light. Whether you’re looking for complete opacity or a subtle frosted effect, this type of film gives your windows the perfect blend of style and function.
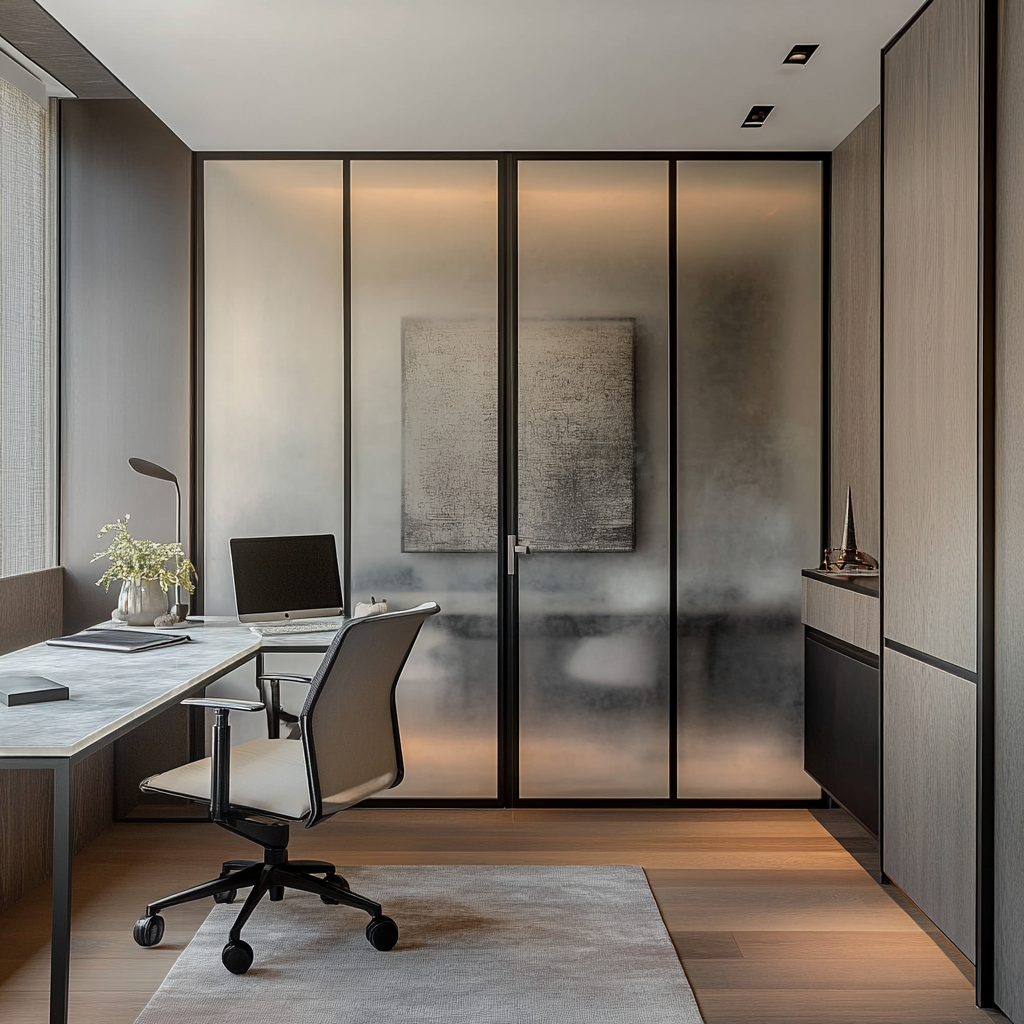
Pro Tip: Frosted window films are also great for creating partitions in open-plan spaces. For instance, use them in your office area to add privacy without blocking light. 🏢
2. Decorative Patterns: Add Personality to Your Glass
Window tinting can be a statement piece, not just a functional element. Decorative films come in various designs, from geometric patterns to Moroccan-inspired tiles. Imagine walking into a room with art-deco-style windows that immediately add charm and uniqueness to the space.
Pro Tip: You can choose between etched, patterned, and colored tints to create the exact look you want. These designs add personality while still blocking out glare and increasing privacy.
3. High-End Look with Darker Tints: Sleek, Sophisticated, and Cool
For a sleek, modern look, you can opt for darker window tints. This style is perfect for creating a luxurious feel. Imagine a living room with deeply tinted windows and minimalist décor — the contrast adds elegance while keeping your home cool and private.
Pro Tip: Use darker tints in living rooms, media rooms, or bedrooms for maximum privacy without sacrificing style. It’s the ultimate chic window treatment.
4. Tinted Bathrooms = Spa Mode Activated
Want a bathroom that feels like a private retreat? Tinted windows in the bathroom give you all the natural light you crave while still providing a sense of privacy. Whether you’re looking to block out the world or just make your space feel more serene, tinted glass helps create that spa-like atmosphere you can enjoy every day.
5. Tinted Living Rooms: Cool, Modern Vibes
Tinting your living room windows can completely transform the feel of your space. Imagine walking into a room where the soft glow of natural light pours in, but you’re not blinded by it. Darker window tints give off an elegant, sophisticated vibe, making the space feel cozy and intimate.
Pro Tip: Choose lighter tints for a balanced look if you want to brighten up your living room while still blocking UV rays.
6. Tinted Bedrooms = Privacy & Dreamy Vibes
Let’s talk bedrooms. Tinted windows in the bedroom offer privacy without sacrificing natural light. The right tint can make your room feel like a peaceful retreat, keeping the outside world at bay.
Pro Tip: Frosted or lightly tinted films work best in the bedroom, providing privacy without making the room feel too dark.
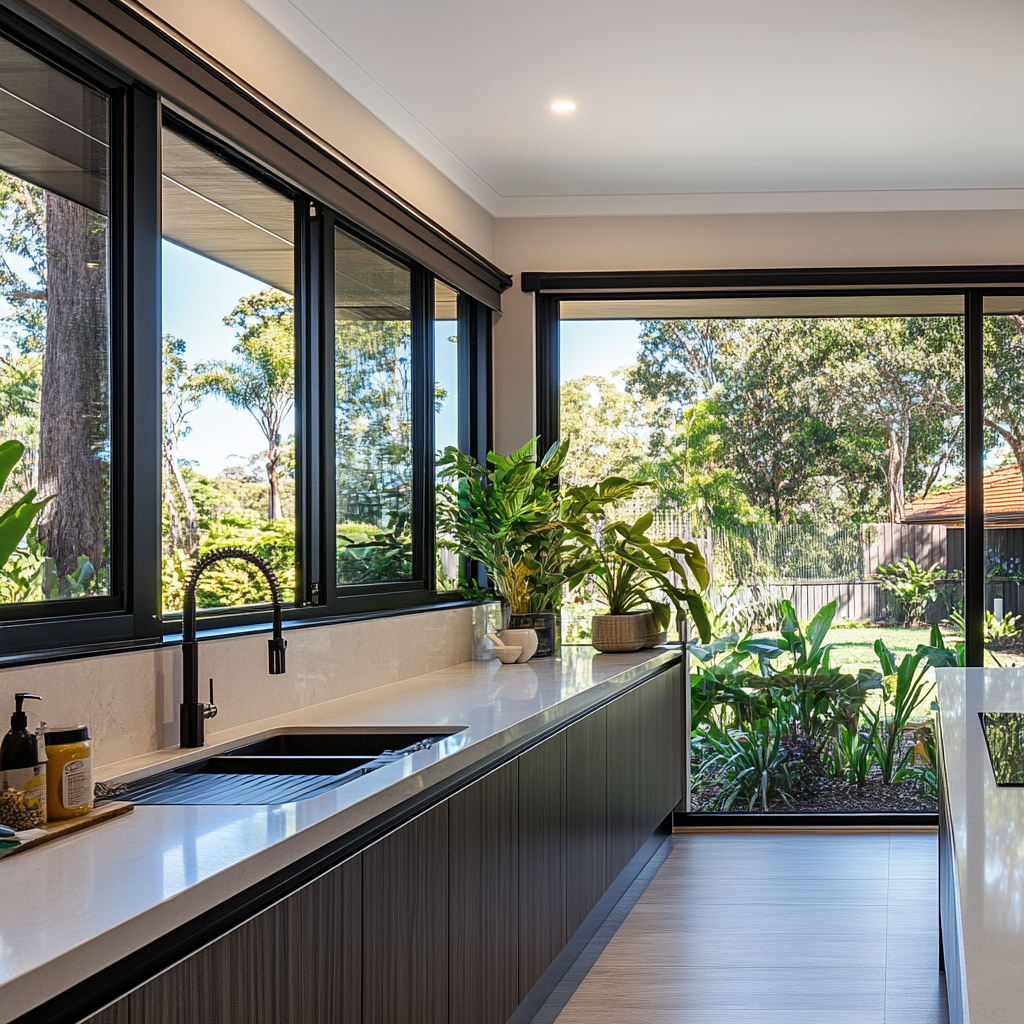
7. Tinted Kitchen Windows: Cool, Calm, and Energy Efficient
Your kitchen windows can benefit from tinted film, too! The last thing you want while cooking is that intense sun glare blinding you as you chop veggies or clean your countertops. Tinted windows can not only keep your space cooler but also help you enjoy a more comfortable cooking experience.
Pro Tip: Choose light to medium tints to maintain the brightness of your kitchen while reducing glare.
Adding Tint to Your Office: The Power of Privacy
If you work from home, you know how essential it is to have privacy. Whether you’re on Zoom calls or need some quiet time to concentrate, tinted windows in your office can give you that seclusion while still allowing natural light to flood in.
Pro Tip: Use a frosted film to create dividers in open-plan offices — you’ll get privacy without compromising the design of the room. Perfect for the modern remote worker! 🖥️💼
💡 More Than Cool Windows: Hidden Benefits You Didn’t Expect
While window tinting is often thought of as a way to block heat and add privacy, there are several hidden benefits you might not have considered yet. Get ready to unlock some of the most valuable advantages of window tinting that will make you wonder why you didn’t do it sooner.
🧠 What Smart Homeowners Know About Tinting
Now that you’ve learned everything about window tinting let’s cover some common topics and myths surrounding it. These answers will help clear up any doubts you might still have — all without sounding like a traditional FAQ section!
Window Tinting Works Great on Double-Pane and Tempered Glass
If you’re wondering whether window tinting can be applied to double-pane or tempered glass, the good news is that it absolutely can. In fact, many high-quality films are designed specifically for these types of windows to ensure that their insulating properties are not compromised. When choosing your film, just make sure it’s compatible with your window style.
Pro Tip: For peace of mind, especially if you’re unsure about the type of glass, consult a professional installer to ensure you’re using the right kind of film for your windows.

Saving Money on Energy Bills with Window Tinting
When it comes to energy efficiency, window tinting can help reduce your cooling costs by up to 30%. By blocking solar heat gain, tinted windows prevent the interior of your home from overheating, meaning you don’t have to crank up the air conditioning as much. During colder months, tinted windows also help to retain indoor heat, contributing to a more comfortable home all year round.
Pro Tip: Pairing window tinting with energy-efficient windows makes your home even more energy-friendly, reducing your utility bills even further. 💸

Window tinting is designed to last for a long time, typically around 10 to 15 years, depending on the film type and how well it’s maintained. Ceramic films tend to last longer and provide better durability, while dyed films may need replacing sooner.
If the tint starts to show signs of fading, bubbling, or peeling, it could be a sign that it’s time for an update. Choosing a higher-quality film from the start can help extend its lifespan.
Pro Tip: Regularly inspecting your windows and making sure the tint is still in good condition can save you the cost of replacing the entire film prematurely.
If you ever need to remove old window tint, it’s a straightforward process. Start by using a hairdryer to heat the adhesive, which will loosen the film. Then, carefully peel off the tint. If it proves stubborn, continue heating it while you peel. After removal, clean up any leftover adhesive with a glass cleaner and a scraper.
Pro Tip: If you’re unsure about removing the tint yourself, hiring a professional might be a good choice to avoid potential damage to the glass.

Window Tinting Protects Furniture and Fabrics from Fading
One of the best perks of window tinting is the UV protection it provides. The film blocks out up to 99% of harmful UV rays, preventing your furniture, carpets, and flooring from fading over time. This means your interior will look new longer, and your wooden furniture is less likely to warp due to prolonged sun exposure.
Pro Tip: Tinted windows are a great way to preserve your upholstery, curtains, and artwork from the harsh effects of the sun. It’s like giving your home a protective shield against UV damage.

Quick Tip 💡
To remove old tint from rear windows, especially near defroster lines, a combination of heat gun and soapy water works wonders. Just remember: avoid using harsh chemicals, and always wipe with a microfiber cloth afterward.